I can’t tell you how long I’ve been waiting to hit “Publish” on this post. Weeks of excitements all leading up this big moment! Can someone pass the champagne? ; )
New Year’s Eve is quickly approaching and, per usual, I’m behind on my resolution-making (and prompt breaking) but a champagne-inspired DIY, oh, I’m on the ball with that. I’d say my priorities are in line. Most people like to go out big on New Year’s Eve and I don’t blame them one bit: dressing to the nines in sparkly outfits and going out is a nonstop adrenaline rush. For me, my most cherished New Year’s Eve memories were when I stayed in. Whether with family, friends, boyfriends, I loved all my New Year’s Eves spent surrounded by people I care about, with a big bowl of taco dip in my lap and a champagne flute in hand.
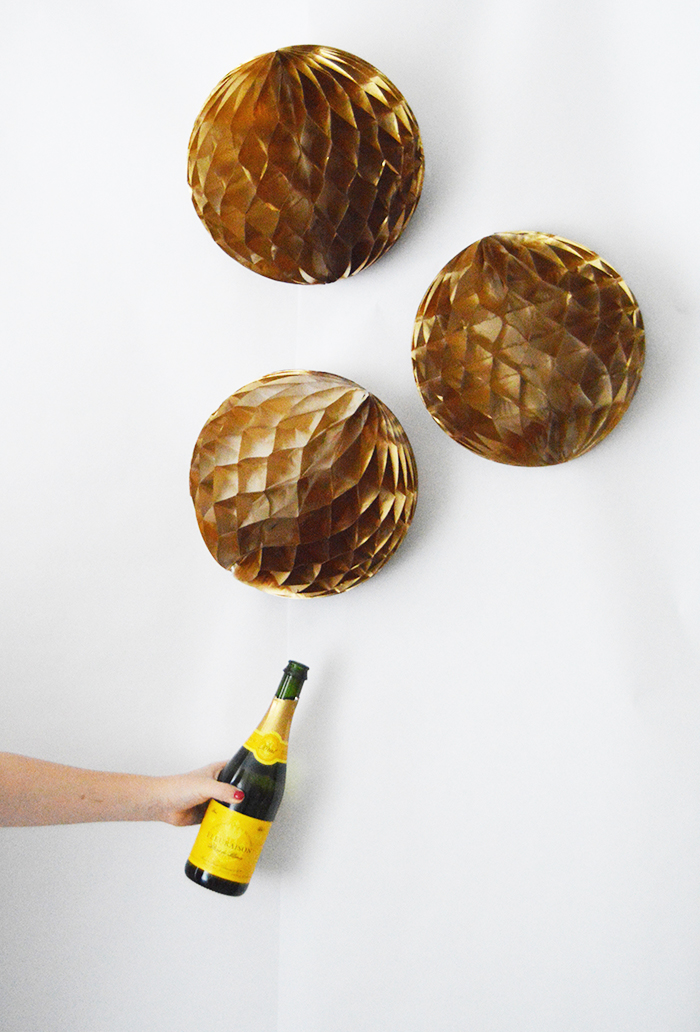
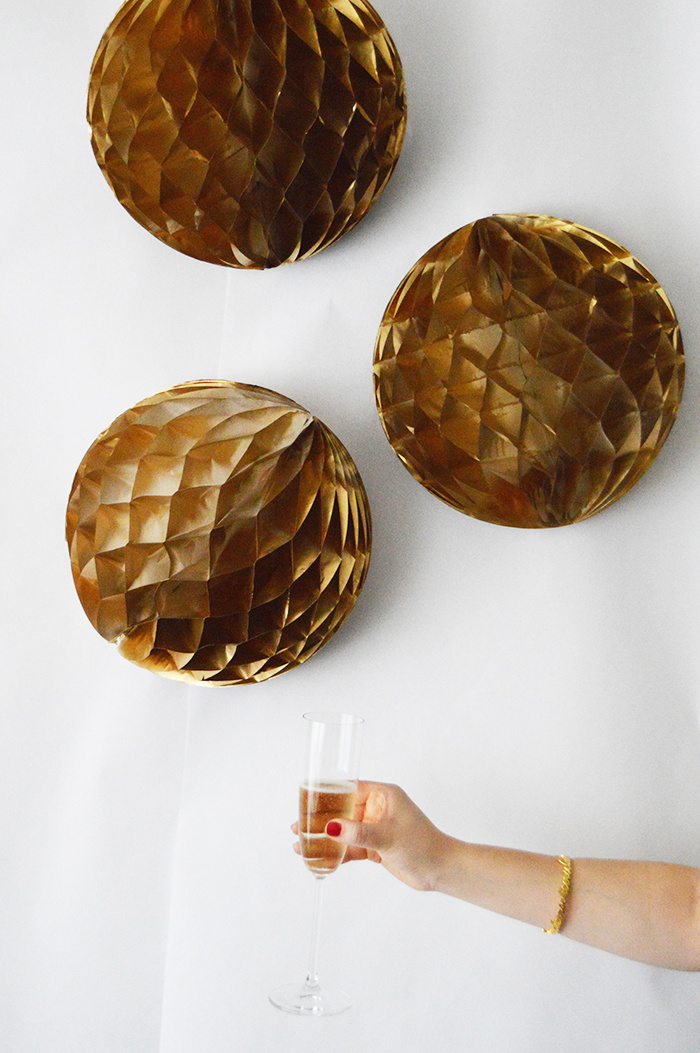
For my final DIY with IKEA DC, I wanted to celebrate ringing in 2015 with lots of champagne bubbles (or sparkling apple cider for some)! Armed with metallic gold spray paint, I DIY’d a photo booth perfect for those planning a New Year’s Eve in to capture fun + silly (after a couple of toasts) memories. And if you’re going to paint the town red this New Year’s Eve, a champagne bubble photo booth would be a great addition to any pregame party. Let’s pop fizz clink! I’ve got my gold spray paint and I’m not afraid to use it!
Supplies
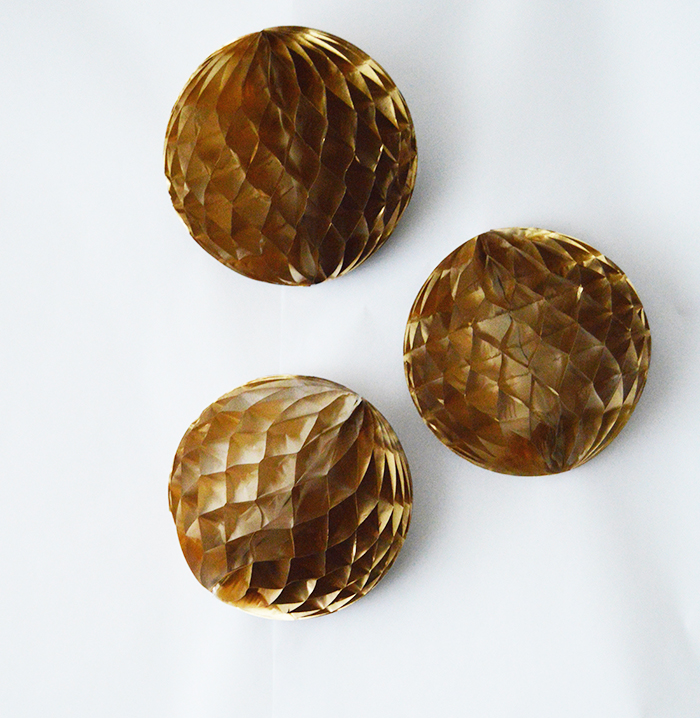
IKEA White Visionar Honeycombs
Paint Tarp
Rustoleum Metallic Finish Gold Spray Paint (2)
Spray Paint Can Grip (optional but helpful)
Duct Tape
White Paper Roll
Instructions
Note: You don’t have to use the spray paint can grip but I highly recommend it for all your spray paint projects. It helps me get an even coating of paint and bonus: sayonara, hand cramps! Am I right?
1. Place the paint tarp in your work area, make sure you do this in a well-ventilated area (preferably outdoors).
2. Spray paint the honeycombs until you achieve a desired level of gold color. I left mine a bit lighter and let some white show to look more like bubbles and not quite so dark.
3. Let dry for about 3-4 hours.
4. Measure and cut the white paper roll to your designated photo booth space. Secure to wall with duct tape.
5. Using duct tape (the gift that keeps on giving), attach the dry gold honeycombs to the paper.
Another Note: You can always hang the bubbles using fishing wire from the ceiling. Make it your own!
A BIG thank you to IKEA DC for teaming up with me to DIY the holidays!! I hope you all enjoyed the IKEA series, too! Please let me know what IKEA posts you’d like to see in 2015.
Check out my other IKEA DIYs for the Holidays:
* * *
Let’s Chat!
Twitter | Pinterest | Instagram | Bloglovin’
![]()
This post was sponsored by IKEA® DC. All opinions and product sentiments are my own. Thank you for supporting the brands that make DC Girl in Pearls possible!